 UV curing speed depends on three groups of variables:
- Light source variables: UV intensity, wavelength, UV dose, lamp distance, reflector condition, lamp age, and conveyor speed.
- Formulation variables: photoinitiator type, photoinitiator dosage, resin reactivity, pigment load, additives, and oxygen inhibition.
- Application variables: film thickness, substrate transmission, coating weight, ink color, adhesive gap, temperature, and production stability.
The fastest way to improve UV curing speed is not always higher lamp power. In many UV coating, UV ink, UV adhesive, and 3D resin systems, the real bottleneck is poor matching between lamp wavelength, photoinitiator absorption, and cure depth demand.
For B2B buyers, the right question is not “Which photoinitiator cures fastest?”
The better question is: Should I change the lamp, the formulation, or the photoinitiator package first?
The 9 Main Factors That Affect UV Curing Speed
UV Curing Speed FactorWhat It ChangesBuyer CheckUV lamp intensityRadical generation speedMeasure irradiance at the film surfaceLamp wavelengthPhotoinitiator absorptionMatch lamp nm with PI absorption rangeUV doseTotal curing energyCheck line speed and exposure timePhotoinitiator typeSurface cure and depth cureSelect 1173, 184, TPO, TPO-L, 819, ITX, DETX by systemPhotoinitiator dosageCure rate and side effectsFind the optimum dosage windowFilm thicknessLight penetration depthTest real coating or adhesive thicknessPigment loadUV blocking and scatteringTest clear, white, black, and colored systems separatelyOxygen inhibitionSurface tackCheck amine, inerting, and surface cure packageSubstrateUV transmission and adhesionTest the real production substrate## The Problem Is Usually Not Just “Slow Cure”
A UV line rarely fails in a clean way. The surface feels dry, but adhesion fails. The ink passes a finger test, but offsets on the next roll. The adhesive looks cured near the edge, but the bond strength drops after aging.
So the operator slows the conveyor. Production loses output. Purchasing asks for a “faster photoinitiator.”
I understand that request. I hear it often at UVIXE. But I also know this: slow UV curing is usually a system problem, not a single-chemical problem. If you only change the photoinitiator without checking lamp wavelength, film thickness, pigment load, and UV dose, you may spend money without fixing the bottleneck.
A dry surface is not always a cured film.
What Affects UV Curing Speed the Most?
UV curing speed is affected most by the match between UV dose, lamp wavelength, and photoinitiator absorption. The formulation must absorb useful UV energy fast enough to start polymerization, and the energy must reach the full film depth.
In production, I split curing speed into three layers:
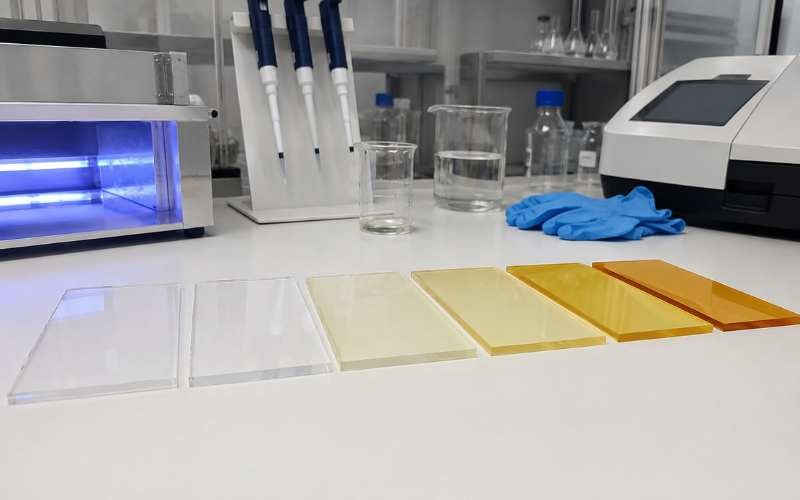
- Surface cure: the top layer becomes dry, non-tacky, and scratch resistant.
- Through cure: the full coating, ink, adhesive, or resin layer cures to the required depth.
- Performance cure: the finished film passes adhesion, rub, hardness, chemical resistance, or bond strength testing.
This is where many factories misread the problem. A clear UV coating may feel dry after exposure but still fail MEK rub. A white UV ink may look cured on the surface but remain soft below the pigment layer. A UV adhesive may cure on one side but fail inside the bond line if the substrate blocks the useful wavelength.
For the basic chemistry behind radical formation, I recommend starting with our guide on what a photoinitiator does in UV curing.
Should You Change the Lamp, Formula, or Photoinitiator First?
Before buying a new photoinitiator, use this decision table. It helps separate lamp problems, formulation problems, and photoinitiator mismatch.
SymptomChange Lamp First?Change Photoinitiator First?Change Formula First?First ActionCure speed dropped over timeYes, maybeNot firstNot firstCheck lamp age, reflector, and irradianceSlow cure after switching to LEDNot alwaysYesMaybeCompare LED wavelength with PI absorptionSurface stays tackyMaybeYesYesCheck oxygen inhibition and surface cure packageThick layer stays softMaybeYesYesCheck film thickness and depth-cure PIWhite ink under-curesNot firstYesYesCheck pigment load and TPO / 819 directionClear coating cures slowlyMaybeYesMaybeCheck dose, 1173 / 184 level, and lamp outputAdhesive fails through plasticMaybeYesYesCheck substrate UV transmissionYellowing after faster cureNoYesYesReduce overdose or change PI blendGood lab result, bad production resultMaybeMaybeYesCompare lab film thickness with production filmThis is the core decision. Do not change three variables at once. You will not know what solved the problem.
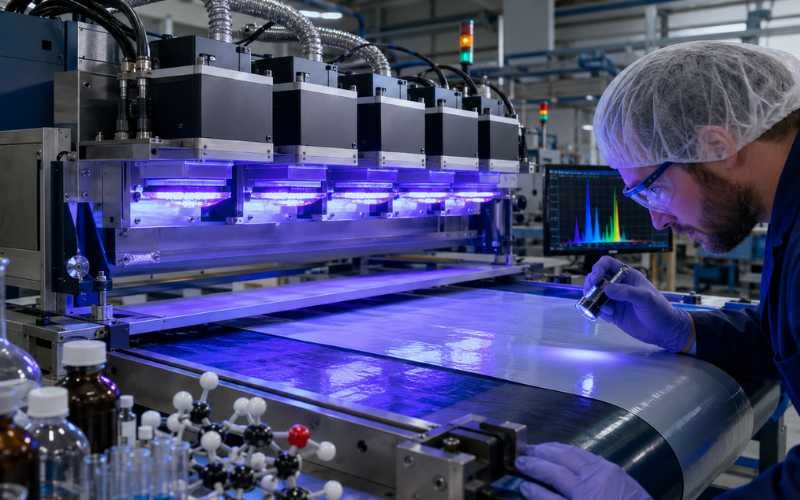
UV Lamp Intensity: More Power Helps Only When the System Can Use It
UV lamp intensity means how much UV power reaches the curing surface at one moment. Low intensity slows radical generation and reduces cure speed. That part is simple.
The problem is that “more power” is not always more useful curing energy. If the photoinitiator does not absorb the lamp’s main wavelength, extra power becomes expensive heat and wasted electricity.
Industry equipment references such as GEW’s guide to energy emitted from UV curing sources explain why UV energy must be understood by wavelength and output, not just by lamp rating. That matters when buyers compare mercury lamps, metal halide lamps, gallium lamps, and UV LED systems.
UV Lamp Problems and Factory Symptoms
Lamp IssueTypical SymptomWhat I Check FirstAging mercury lampCure becomes slower at same conveyor speedLamp hours and measured UV outputDirty reflectorUneven cure across web widthIrradiance map across left, center, rightWrong LED wavelengthTack or poor depth cureLED peak wavelength vs photoinitiator absorptionExcess lamp distanceWeak cure in thick filmDistance from lamp to material surfacePoor coolingYellowing, odor, substrate deformationHeat load and IR exposureNarrow lamp widthEdge under-cureLamp width vs coating or web widthPoor maintenanceRandom cure variationCleaning and replacement scheduleIf your UV curing speed dropped after months of stable production, do not blame the photoinitiator first. Check the lamp.
That is cheap troubleshooting.
Wavelength Match: The Photoinitiator Must Absorb the Light You Use
A photoinitiator does not react to all light equally. It absorbs specific wavelengths. After absorption, it creates active species that start polymerization.
This is why a mercury-to-LED switch can break a previously stable formula. Medium-pressure mercury lamps provide broad-spectrum output. UV LED systems are narrower and often use 365 nm, 385 nm, 395 nm, or 405 nm. RadTech’s UV LED curing report explains how chemistry and application performance change when LED curing replaces traditional lamp systems.
In real production:
- 1173 is often used for fast surface cure in clear coatings, varnishes, and adhesives.
- 184 gives balanced surface cure in many clear or light-color systems.
- TPO is often tested for UV LED and medium-depth curing.
- TPO-L helps when a liquid phosphine oxide option is easier to blend.
- 819 / BAPO is often used where deeper cure, pigmented systems, or 3D resin performance matters.
- ITX and DETX support many pigmented UV ink systems, usually as part of a broader formulation package.
For a focused comparison, see our TPO vs 819 guide for UV LED and depth cure.
Lamp Wavelength and Photoinitiator Direction
 Lamp SystemTypical Output CharacterCommon Cure RiskPI Direction to ScreenMercury lampBroad UV outputHeat, lamp aging, inconsistent maintenance1173 / 184 / TPO blendsMetal halide lampStronger longer-wave UV than standard mercuryApplication-specific matchingTPO / 819 direction365 nm LEDNarrow LED outputPI absorption mismatchTPO / 819 / selected blends385 nm LEDCommon LED curing wavelengthSurface tack or depth issueTPO / TPO-L / 819395 nm LEDCommon industrial LED wavelengthOld mercury formulas may slow downTPO / TPO-L / 819405 nm LEDLonger wavelength LEDNeeds suitable PI absorption819 / TPO directionIf you are switching from mercury to UV LED, send UVIXE your LED wavelength and current PI package before ordering bulk material. A one-page check can prevent a slow production trial.
UV Dose: Curing Speed Is Energy Over Time
UV dose is the total UV energy received during exposure. It connects lamp intensity with time.
UV dose = irradiance × exposure time
In production terms, conveyor speed controls exposure time. When the line runs faster, the film receives less UV dose. If the formulation needs more energy than the faster line provides, you get tack, poor rub resistance, soft depth cure, or adhesion failure.
Line Speed and UV Dose Decision Matrix
 Production ChangeEffect on UV DoseCommon ResultBetter QuestionIncrease conveyor speedReduces exposure timeUnder-cure risk risesCan the formula cure at lower dose?Add another lampIncreases total doseHigher energy and maintenance costIs the extra wavelength useful?Reduce lamp distanceRaises surface intensityBetter surface cureDoes it overheat the substrate?Reduce film thicknessImproves depth cureMay reduce coverage or performanceCan the product still meet spec?Improve PI packageRaises curing efficiencyFaster line possibleWhich PI absorbs the lamp output?Change wavelengthImproves absorption matchFaster cure possibleDoes the PI absorb the new wavelength?Line speed is where cheap raw material becomes expensive. If a lower-price photoinitiator forces the conveyor to run slower, the purchase saving can disappear in one production week.
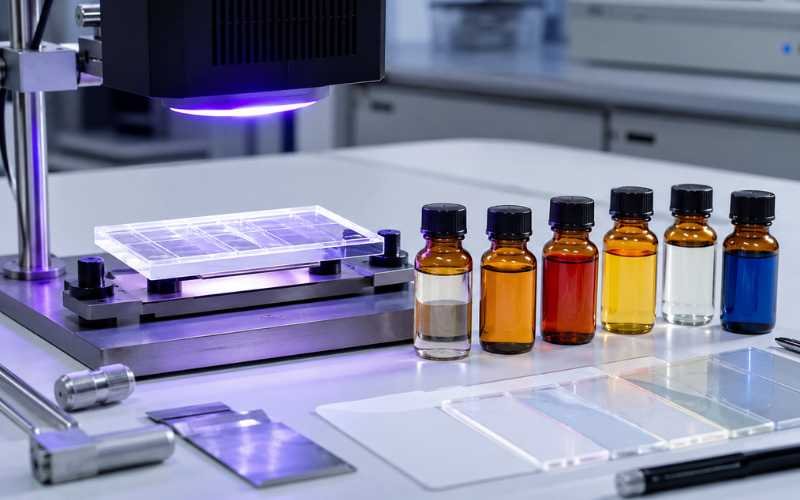
Photoinitiator Type: Surface Cure and Depth Cure Are Different Problems
Photoinitiator selection should start with the cure target. Do you need surface cure, depth cure, low yellowing, pigment tolerance, LED matching, or liquid handling?
One photoinitiator rarely solves every problem.
 ### Photoinitiator Selection by Industrial Cure Target
PhotoinitiatorMain RoleBetter FitBuyer Note1173Fast surface cureClear UV coating, varnish, adhesivesLiquid form, useful for blending184Balanced surface cureClear coatings, light-color coatings, adhesivesSolid powder, widely usedTPOSurface + medium-depth cureUV LED coatings, inks, adhesivesStrong direction for 365–405 nm systemsTPO-LLiquid phosphine oxideLow-viscosity UV inks and coatingsEasier handling than solid TPO819 / BAPODeep cureThick films, pigmented inks, 3D resinsUseful for depth cure and low-yellowing goalsITXSensitizer directionOffset, screen, and pigmented UV inksOften used with amine systemsDETXSensitizer directionColored UV ink and coating systemsSupports absorption in selected systems907Surface cure supportInks and coatings needing strong initiationNeeds application-specific checks369High-reactivity directionPigmented and ink systemsCheck odor, migration, and regulatory needsFor clear coatings, buyers often start with fast surface cure photoinitiator 1173 or low-yellowing photoinitiator 184 for UV coatings. For LED and depth-cure systems, they usually screen UV LED curing photoinitiator TPO or deep cure photoinitiator 819 for pigmented systems.
Photoinitiator Dosage: More Is Not Always Faster
Increasing photoinitiator dosage can raise UV curing speed, but only within the useful range. Past that range, more PI can create yellowing, odor, haze, poor solubility, migration concerns, or storage instability.
This is one of the most common formulation traps.
More PI is not a strategy. It is a test variable.
Scientific work such as this PMC study on photoinitiator type and curing conditions shows that photoinitiator chemistry and curing conditions affect final cured properties. For an industrial buyer, that means cure speed and final performance must be tested together.
Photoinitiator Dosage Window
Dosage ConditionCure ResultFactory RiskToo lowSlow cure, tack, weak hardnessLine speed must dropNear optimumStable cure and better productivityBest test targetToo highYellowing, odor, cost increaseFormula may pass speed but fail qualityPoor solubilityHaze, particles, uneven cureMixing and QC problemsWrong blendSurface dry but depth softFalse pass in quick touch testWhen a buyer says “increase PI to make it faster,” I ask what failure they are solving. Surface tack and soft depth need different cure strategies.
Film Thickness: Thin Coatings and Thick Layers Do Not Cure the Same Way
Film thickness controls how far UV light must travel. Thin clear coatings cure faster because light can reach most of the film. Thick screen ink, adhesive beads, pigmented coatings, and 3D resin layers demand stronger depth-cure design.
A common mistake is testing a thin lab drawdown, then applying a thicker production film. The lab passes. Production fails.
That is not a supplier mystery. That is a test design problem.
Typical Application Cure Risks by Layer Type
ApplicationTypical Layer CharacterMain Cure RiskPI DirectionOPV / clear UV coatingThin, clear filmSurface tack, gloss, scratch1173 / 184Wood UV coatingThin to medium filmSurface cure, yellowing, adhesion184 / 1173 / TPO blendUV offset inkThin but pigmentedPigment blocking, offsetTPO / ITX / DETXUV screen inkThicker ink layerDepth cure failureTPO / 819 directionWhite UV inkPigmented and light-scatteringBottom layer soft819 / TPO blendUV adhesiveVariable bond gapThrough cure and substrate blockingTPO-L / 819SLA resinControlled thin layersCure depth and accuracy819 / TPO / 184 blendDLP resin385/405 nm exposureSpeed vs resolution819 / TPO-L / 184 directionIf your issue is white ink or thick coating under-cure, ask UVIXE for a TPO / 819 screening sample instead of testing random low-price stock.
Pigment Load and Color: White and Black Systems Cure Slower for a Reason
Pigments can absorb, reflect, scatter, or block UV light. Clear coatings are easier. White and black systems are harder. High-opacity inks are harder still.
Titanium dioxide in white ink can scatter light. Carbon black can absorb strongly. Metallic pigments can create uneven reflection. This is why a photoinitiator that works in clear varnish may fail in a white ink formula.
 ### Anonymous Field Case: White UV Ink Under-Cure
In one white UV ink trial, the buyer first increased lamp power. Surface tack improved, but cross-hatch adhesion still failed. The lower ink layer stayed weak because the pigment package blocked energy penetration.
The first useful test was not more 1173. We moved the screening direction toward TPO / 819 with a sensitizer review.
The lesson is simple: do not test clear varnish and expect white ink to behave the same.
Pigment Color and Cure Strategy
System TypeCommon ProblemWhat to TestClear UV coatingSurface tack or low hardness1173 / 184 level and doseWhite UV inkPoor through cure819 / TPO depth-cure directionBlack UV inkStrong UV absorptionSensitizer and lamp outputColored UV inkColor-dependent absorptionTest each pigment systemMetallic inkReflection and uneven cureDose map and adhesionFilled coatingLight blocking and viscosityFilm thickness and PI blendFor UV ink factories, I always ask for the real color system. A clear sample does not predict white, black, or high-opacity ink.
Oxygen Inhibition: Why the Surface Stays Tacky
Oxygen inhibition happens when oxygen interferes with radical polymerization at the surface. The film may cure below the surface, but the top stays tacky.
Typical signs include:
- Tacky surface after normal exposure
- Dust pickup after curing
- Weak scratch resistance
- Poor rub resistance
- Better surface cure under film or nitrogen
- Better cure after higher surface irradiance
Permabond’s guide to factors affecting UV cure discusses practical cure conditions such as light access, gaps, contamination, and process variables. In coating and ink plants, oxygen inhibition is one of the first checks when the surface stays sticky.
 ### Oxygen Inhibition Fix Options
Fix OptionWhen It HelpsBuyer WarningMore surface-reactive PISurface tackMay raise yellowing or odorAmine synergistAcrylate surface cureCheck odor and migration limitsNitrogen inertingHigh-speed coating and printingAdds equipment and gas costWax or surface additiveCertain OPV and coatingsMay change gloss or printabilityHigher surface irradianceMild tackDoes not fix depth cureBetter PI blendMixed surface/depth problemNeeds controlled trialSurface tack is not always full under-cure. Treat it separately.
Resin, Monomer, and Oligomer Reactivity
Photoinitiators start the reaction. The resin system decides how fast the network forms and what properties the cured film has.
A highly functional acrylate can cure fast but become brittle. A flexible UV adhesive may need slower, controlled cure to maintain bond strength. A 3D resin needs speed, but also cure depth control and dimensional stability.
Key formulation variables include:
- Oligomer functionality
- Monomer reactivity
- Viscosity
- Additive package
- Filler level
- Inhibitor level
- Storage stability
- Final hardness or flexibility
- Yellowing target
- Odor or migration limits
This is why I do not sell “the fastest photoinitiator” as a universal answer. The better target is the fastest safe cure for your final performance requirement.
Substrate Transmission: The Material Under the Film Can Slow Cure
Substrate choice affects UV curing speed in two ways. First, it may block part of the UV light. Second, it changes adhesion, which can be mistaken for poor cure.
For UV adhesives, this is critical. Glass, PET, PC, acrylic, PVC, and coated films do not transmit UV in the same way. Some plastics reduce shorter UV wavelengths. If the adhesive must cure through that material, the photoinitiator must absorb the wavelength that actually passes through the substrate.
For UV inks and coatings, substrate surface energy matters. A coating can be cured but still fail adhesion if the substrate is untreated or contaminated.
 ### Substrate-Related UV Curing Problems
SubstratePossible IssuePractical CheckGlassUsually good transmission, but thickness mattersCheck real glass thicknessPET filmCan reduce certain UV rangesTest the exact film gradePVCPlasticizers can affect cure and adhesionCheck formulation and surface conditionAcrylicTransmission depends on gradeMatch wavelength and substrateCoated paperAbsorption and surface variationTest coating weight and rubMetalNo transmission from belowCure must happen from exposed sidePrinted filmInk stack blocks UVTest final printed structureDo not send your supplier a substitute substrate and expect a reliable recommendation. Send the real material.
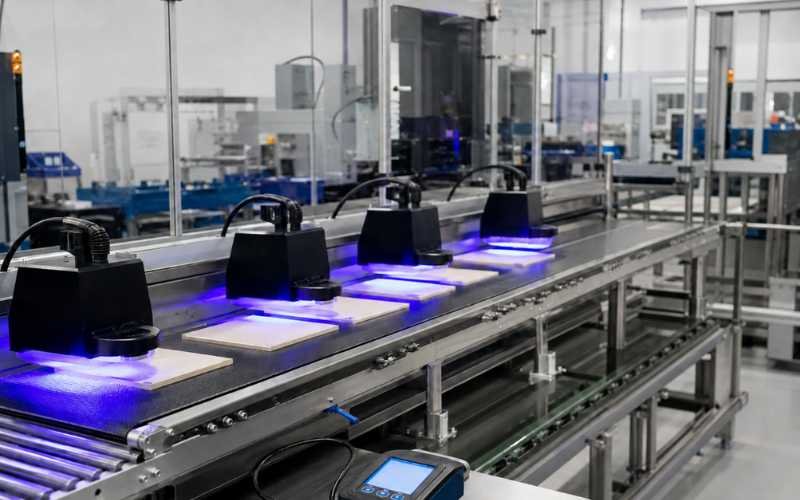
Temperature, Humidity, and Process Stability
UV curing is not thermal curing, but temperature still matters. It affects viscosity, flow, oxygen diffusion, substrate behavior, and lamp performance.
Humidity can also affect paper, wood, and some adhesive or coating systems. Sometimes the cure is fine, but adhesion changes because the substrate condition changed.
Process stability includes:
- Raw material storage
- Mixing time
- Dispersion quality
- Coating weight
- Lamp output
- Conveyor speed
- Temperature control
- Batch-to-batch PI quality
- Sample-to-bulk consistency
For B2B procurement, batch consistency is not a side detail. It is production insurance.
UV Curing Speed Diagnostic Checklist for Buyers
Before asking for a new photoinitiator quotation, prepare this data. It helps a supplier give a useful recommendation instead of a generic product name.
QuestionWhy It MattersData to SendWhat lamp do you use?Defines UV outputMercury, metal halide, LEDWhat is the wavelength?Determines PI absorption match365, 385, 395, 405 nm, or broad spectrumWhat is the irradiance?Shows power at cure surfacemW/cm² or W/cm²What is the UV dose?Connects energy with line speedmJ/cm² or J/cm²What is the line speed?Controls exposure timem/minWhat is the film thickness?Controls depth demandμm or mmWhat color is the system?Predicts UV blockingclear, white, black, coloredWhat is the substrate?Affects transmission and adhesionglass, PET, PVC, paper, metal, acrylicWhat is the current PI package?Avoids blind replacementPI names and dosageWhat is the failure symptom?Separates surface vs depthtack, soft layer, poor adhesion, yellowingThis table is simple. It also saves days of trial work.
Troubleshooting Matrix: Match the Symptom Before Changing the Formula
SymptomLikely CauseFirst CheckPossible DirectionSurface tackOxygen inhibition or weak surface cureSurface rub and tack test1173 / 184, amine, inertingDeep layer softPoor UV penetrationFilm thickness and pigment load819 / TPO directionSlow cure after LED switchWavelength mismatchLED peak nm vs PI absorptionTPO / TPO-L / 819YellowingOverdose or wrong PIYellowing index and dosageLower dosage or change PIPoor adhesionUnder-cure or substrate issueCross-hatch and surface treatmentAdjust dose and substrate prepInk offsetSlow surface curePress speed and lamp outputImprove surface cure packageAdhesive weak bondPoor through cure or blocked UVSubstrate transmissionChange wavelength or PI packageResin over-curesCure depth too highWorking curve and layer testAdjust PI dosage and blendRandom cure variationProcess instabilityMixing, lamp output, coating weightStabilize process firstWhen the symptom is clear, the next test becomes obvious.
Anonymous Field Case: LED Switch Slowed the Same Formula
A coating customer once moved from a broad mercury system to a 395 nm LED curing line. The old formulation still contained a photoinitiator package built around the previous lamp.
The result was confusing. Lamp power looked strong. The line was new. But cure speed dropped.
The problem was wavelength match. The old package did not use the 395 nm LED output efficiently. The first useful screening direction was TPO / TPO-L / 819, not simply adding more of the old PI.
The lesson: new LED equipment does not make old mercury chemistry faster by default.
Anonymous Field Case: Low-Cost PI Increased Total Cost
A trader once asked why a cheaper photoinitiator grade caused complaints from a UV coating customer. The price per kilogram looked attractive. But the factory had to reduce conveyor speed and increase lamp exposure to pass rub resistance.
The raw material saving was visible. The lost output was hidden.
After checking the failure pattern, the buyer realized the real cost included slower line speed, more QC holds, and unstable batch performance.
The lesson: photoinitiator TCO is not the quotation price. It is the cost per qualified finished meter, sheet, bottle, or batch.
TCO: Why the Cheapest Photoinitiator Can Slow Your Whole Factory
For procurement managers, photoinitiator cost should be calculated through production results, not just price per kilogram.
A low-price product can become expensive if it causes:
- Lower conveyor speed
- Higher lamp energy use
- More rejected rolls or panels
- Extra QC testing
- Poor storage stability
- Insoluble particles or haze
- Emergency replacement orders
- Customs delay due to weak documents
- Sample-to-bulk mismatch
Photoinitiator TCO Checklist
Cost FactorWhy It MattersProcurement QuestionDosage efficiencyLower use level may reduce formula costWhat dosage range should we test?Cure speedFaster line speed raises outputDoes the PI match our lamp wavelength?Batch consistencyReduces reformulation riskIs COA supplied batch by batch?SolubilityPrevents haze and particlesHas it been tested in our resin system?DocumentationSupports compliance and customsCan you provide SDS and TDS?Lead timeProtects production scheduleIs stock or production capacity stable?MOQSupports lab and pilot testingCan we start with sample or small order?PackagingReduces leakage and moisture riskIs export-grade packaging used?TraceabilityHelps solve quality disputesCan batches be tracked clearly?For Europe, the Middle East, India, and Southeast Asia, I also suggest checking SDS format, GHS classification, export documents, storage conditions, and customs paperwork before bulk purchase. The European Chemicals Agency guidance on safety data sheets is a useful reference for EU-facing buyers.
Procurement Checks Before Buying a Faster Photoinitiator
A faster photoinitiator is only useful if it arrives with stable quality and usable documents.
Procurement CheckWhy It MattersCOAConfirms batch-specific quality dataSDSSupports safe handling, storage, and customsTDSHelps R&D compare performance and application directionSample-to-bulk consistencyPrevents pilot success and bulk failureBatch traceabilityReduces dispute riskExport packagingReduces leakage, contamination, and moisture exposureLead timeProtects production planningMOQSupports lab, pilot, and scale-up stagesCommunication speedReduces downtime during troubleshootingUVIXE supports international buyers through our photoinitiator supplier team with COA, SDS, TDS, sample support, export packaging, and practical lead-time discussion.
How I Select Photoinitiators When a Customer Says “Our UV Cure Is Too Slow”
When a customer asks UVIXE for faster curing, I do not start with a product name. I start with the production condition.
I ask for:
- Lamp type
- Peak wavelength
- Irradiance or dose
- Application type
- Film thickness or adhesive gap
- Pigment color and loading
- Substrate
- Current photoinitiator package
- Dosage
- Failure symptom
- Target line speed
- Low-yellowing or odor limits
Then I suggest a test direction.
Customer SituationFirst Screening DirectionClear UV coating cures slowly1173 / 184 and lamp output checkUV LED coating stays tackyTPO / TPO-L / 819 wavelength matchWhite UV ink under-cures819 / TPO with sensitizer reviewUV adhesive cures slowly through plasticSubstrate transmission and PI absorptionSLA resin needs depth control819 / TPO / 184 blend screeningDLP resin needs faster layer cure819 / TPO-L / 184 directionInk cures but odor is highDosage, amine, and residual monomer reviewFormula yellows after faster curePI type and overdose reviewThis is also how a buyer can judge a supplier. If a supplier only says “use this product” without asking for curing conditions, the recommendation is weak.
Which Photoinitiator Direction Should You Test First?
Use this as a first screening guide. It is not a final formula. It helps technical buyers avoid random sampling.
ApplicationMain Cure NeedStarting DirectionClear UV wood coatingFast surface cure and low yellowing1173 / 184Plastic UV coatingAdhesion and balanced cure184 / TPO blendPaper UV varnishFast line speed and gloss1173 / 184UV offset inkSurface cure and pigment toleranceTPO / ITX / DETXUV screen inkThick ink layer cureTPO / 819White UV inkDeep cure through TiO₂819 / TPO blendUV adhesiveBond-line depthTPO-L / 819 depending substrateSLA resinCure depth and print accuracy819 / TPO / 184DLP resinFast layer cure and low yellowing819 / TPO-L / 184UV LED coating365–405 nm absorptionTPO / TPO-L / 819For clear systems, compare 1173 vs 184 for fast UV surface cure. For LED and pigmented systems, compare TPO vs 819 for UV LED and depth cure.
 ## UV Curing Test Record Sheet for R&D and Purchasing
A curing test without data cannot guide a purchasing decision. Record these parameters during lab and pilot trials.
ParameterUnit or FormatWhy It MattersLamp typeMercury / LED / metal halideDefines spectral outputPeak wavelengthnmMust match PI absorptionIrradianceW/cm² or mW/cm²Shows power at cure surfaceUV dosemJ/cm² or J/cm²Connects line speed with cure resultConveyor speedm/minDirectly affects exposure timeFilm thicknessμm or mmControls depth cure demandPI dosage% by weightShows efficiency and side effectsPigment colorclear / white / black / coloredPredicts UV blockingSubstratematerial and gradeAffects transmission and adhesionCure resulttack, rub, hardness, adhesionConfirms real performanceYellowing resultvisual or YI testProtects appearance and qualityStorage resultdays or weeksChecks stability after mixingThis table helps R&D and procurement speak the same language. It also makes supplier comparison fair.
FAQ
What is the biggest factor affecting UV curing speed?
The biggest factor affecting UV curing speed is the match between UV dose, lamp wavelength, and photoinitiator absorption. If these three do not match, the system may cure slowly even when lamp power is high.
How can I increase UV curing speed?
You can increase UV curing speed by improving wavelength match, increasing useful UV dose, reducing film thickness, using a more suitable photoinitiator package, controlling oxygen inhibition, and stabilizing coating weight and lamp output.
Does higher UV lamp power always increase curing speed?
No. Higher lamp power helps only when the photoinitiator can absorb the emitted wavelength and the formulation allows light to reach the cure depth. Otherwise, extra power may only add heat and cost.
Why is my UV coating not curing?
Common reasons include low UV dose, old lamps, wrong wavelength, low photoinitiator level, oxygen inhibition, excessive film thickness, pigment blocking, poor substrate condition, or wrong resin reactivity.
Why is my UV coating tacky after curing?
A tacky UV coating surface often comes from oxygen inhibition, low surface irradiance, insufficient surface-reactive photoinitiator, wrong wavelength match, or low UV dose.
Why does UV ink cure slower than clear UV coating?
UV ink often cures slower because pigments absorb or scatter UV light. White, black, metallic, and high-opacity inks need stronger depth-cure design than clear coatings.
Which photoinitiator improves UV LED curing speed?
TPO, TPO-L, and 819 are common screening directions for UV LED curing speed, especially under 365–405 nm LED lamps. The final choice depends on film thickness, pigment, resin chemistry, and yellowing limits.
Can I increase cure speed by adding more photoinitiator?
Sometimes, but only within the optimum dosage window. Too much photoinitiator can cause yellowing, odor, haze, poor storage stability, migration concerns, or higher cost.
Why did my UV curing speed drop after switching from mercury to LED?
Mercury lamps provide broad-spectrum UV output, while UV LED lamps emit in a narrow wavelength band. Your old photoinitiator package may not absorb the LED wavelength efficiently.
Why does my UV adhesive cure slowly through plastic?
The plastic may block part of the UV wavelength. Check substrate transmission, adhesive gap, lamp wavelength, and photoinitiator absorption before increasing dosage.
What data should I send to a photoinitiator supplier?
Send lamp type, peak wavelength, irradiance, UV dose, line speed, film thickness, substrate, pigment color, current photoinitiator package, dosage, and failure symptoms.
Faster UV Curing Starts With the Right Bottleneck
UV curing speed improves when you identify the real bottleneck. Sometimes the problem is lamp aging. Sometimes it is oxygen inhibition. Sometimes the film is too thick, the pigment blocks light, or the substrate prevents UV transmission.
But in many production cases, the issue is direct: the photoinitiator package does not match the lamp wavelength and cure depth requirement.
Do not buy by product name alone. Do not buy by price alone. Check wavelength, UV dose, film thickness, pigment load, substrate, and final performance data first.
That is how you improve cure speed without creating a new quality problem.
Send Us Your UV Curing Conditions Before You Change the Formula
If your UV coating, UV ink, UV adhesive, SLA resin, or DLP resin cures too slowly, send UVIXE your lamp wavelength, film thickness, substrate, pigment color, current photoinitiator package, target line speed, and failure symptoms.
We can help you screen 1173, 184, TPO, TPO-L, 819, ITX, DETX, 907, and 369 based on real curing conditions. UVIXE supports B2B buyers with sample testing, COA, SDS, TDS, export packaging, MOQ discussion, and stable lead time for international shipments.