What Causes The Photoinitiator Yellowing Issue?
The photoinitiator yellowing issue happens when a UV formulation turns yellow, cream, amber, or warm-toned after curing, heat aging, sunlight exposure, or storage. In my UVIXE work with UV coating, UV ink, UV adhesive, and SLA/DLP resin buyers, I rarely see yellowing caused by one raw material alone. It is usually a system problem.
The main causes are:
- Photoinitiator fragments formed after UV decomposition.
- Unreacted photoinitiator left in the cured film.
- High photoinitiator dosage used to force faster curing.
- Amine synergists that improve surface cure but may increase yellowing and odor.
- Poor wavelength match between the UV lamp and photoinitiator absorption.
- Resin, oligomer, pigment, and additive reactions during UV exposure or aging.
- Heat load and over-curing, especially in clear coatings and UV adhesives.
The practical fix is to diagnose the yellowing type first. For clear UV coatings and adhesives, I usually start with Photoinitiator 1173 or Photoinitiator 184. For LED UV or deeper cure, I test Photoinitiator TPO-L and 819/BAPO blends. Final approval should use measurable color data such as ASTM E313 Yellowness Index, not only visual checking.
| If The Product Yellows | First Action |
|---|---|
| Clear coating yellows after cure | Test 1173 / 184 at lower dosage |
| LED UV formula cures slowly and yellows | Check wavelength match and test TPO-L / 819 |
| White ink turns cream | Review amine + 819 + pigment interaction |
| Adhesive yellows after heat aging | Test blank resin and lower heat load |
| UV ink yellows with odor | Reduce amine and retest YI / Δb* |
UVIXE 4-Step Yellowing Diagnosis Method
When a buyer sends me a yellowing problem, I do not start by replacing the photoinitiator. I start by separating the yellowing source. This avoids a costly mistake: changing a useful PI package while the real problem sits in the resin, amine, lamp, or curing window.

Step 1: Identify When Yellowing Appears
Yellowing timing tells you where to look first.
| Yellowing Timing | Likely Root Cause | First Lab Check |
|---|---|---|
| Right after cure | PI fragments, high dosage, over-cure | Compare current PI with 1173 / 184 |
| After 24–72 hours | Post-cure oxidation or resin issue | Run aged blank resin test |
| After heat exposure | Thermal yellowing | Test 60–80°C aging |
| After sunlight or UVA exposure | Photodegradation | Run UV aging test |
| After LED conversion | Wavelength mismatch or higher dosage | Check LED wavelength and PI absorption |
Step 2: Separate PI Yellowing From Resin Yellowing
Prepare one blank resin sample without photoinitiator. Cure or age it under the same condition as the production sample.
If the blank resin yellows, do not blame the photoinitiator first. Check the oligomer, monomer, stabilizer, substrate, and heat load.
Step 3: Match Photoinitiator Absorption To Lamp Wavelength
A poor lamp match often forces the lab to increase photoinitiator dosage. That may improve cure speed, but it can make yellowing worse.
This is common when factories move from mercury lamps to 385 nm or 395 nm LED systems without changing the PI package.
Step 4: Confirm With YI, Δb*, And Aging Data
Visual checking is only a screen. A real B2B approval process should include Yellowness Index, b, or Δb values. Intertek’s Yellowness Index ASTM E313 guide explains how YI measures the shift from clear or white toward yellow using spectrophotometric data.
UVIXE field note: I reject one-sample conclusions often. A single cured film on a white card does not prove much. I want a blank resin, a current PI control, and at least two candidate PI packages tested under the same lamp, film thickness, and aging condition.
Which Yellowing Pattern Are You Actually Seeing?
The fastest way to reduce yellowing is to define the pattern first. The wrong pattern leads to the wrong fix.
Yellowing Diagnosis Framework
| Yellowing Pattern | Likely Cause | First Check | First PI Direction |
|---|---|---|---|
| Yellow tone right after cure | PI fragments, high dosage, over-cure | Compare lower dosage and same cure energy | 1173 / 184 |
| Yellowing after heat aging | Resin, amine, thermal degradation | Run blank resin aging test | Low-yellowing PI + heat test |
| Yellowing after sunlight exposure | Film photodegradation | Run UV aging comparison | PI + resin review |
| White coating turns cream | PI + pigment + amine interaction | Check TiO₂ and amine package | 819 blend + dosage control |
| Clear adhesive turns amber | Heat load or aromatic components | Test thinner film and lower dose | 1173 / 184 / TPO-L |
| LED system cures slowly and yellows | Poor wavelength match | Check LED wavelength | TPO-L / 819 blend |
| UV ink yellows with odor | Amine or Type II package | Reduce amine and compare YI | ITX / DETX / 907 review |
If you already know when yellowing appears, send UVIXE that timing plus your lamp wavelength and current PI dosage. We can help narrow the first PI direction before you test every option.
Why Does Yellowing Matter In UV Coatings, Inks, Adhesives, And 3D Resins?
Yellowing matters because it turns a cured product into a rejected product. A UV coating can pass tack-free, adhesion, hardness, and solvent rub tests, yet still fail because the final color looks warm, aged, or unstable.
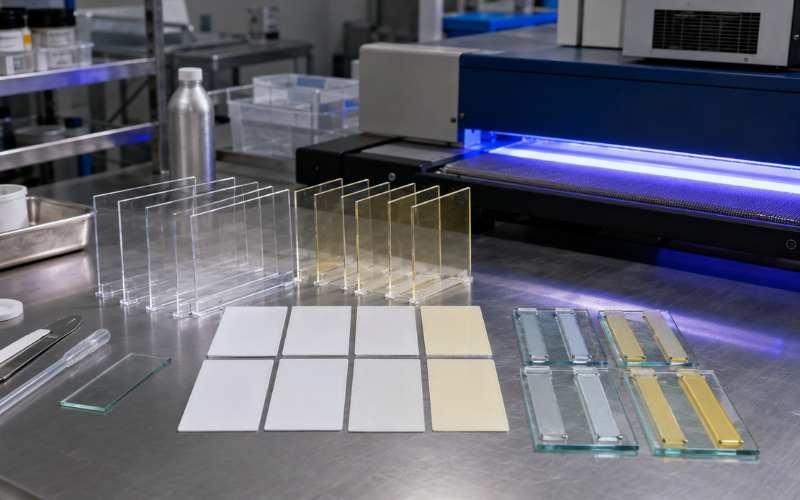
The photoinitiator yellowing issue is most sensitive in:
- Clear UV coatings
- White UV coatings
- UV overprint varnish
- Optical UV adhesives
- Plastic coatings
- Wood coatings
- SLA and DLP 3D printing resin
- Light-color UV inks
- Packaging varnishes
For procurement teams, yellowing means delayed shipment, extra QC time, customer complaints, and repeated reformulation. For R&D teams, yellowing means the cure package may not match the real production window.
A low price per kilogram does not help if the batch fails color approval. The better metric is cost per accepted batch.
What Are The Main Causes Of Photoinitiator Yellowing?
Photoinitiators start the UV curing reaction. After absorbing UV or LED light, they form active species that start polymerization. That reaction is necessary, but the by-products can affect color.
Research on photoyellowing and discoloration of UV-cured acrylated clear coating systems links yellowing to photoinitiator fragments, unreacted photoinitiator, and chromophoric structures. Another study on factors affecting photoyellowing during photopolymerization reported that some acetophenone Type I photoinitiators gave lower yellowing, while amines increased yellowing in the tested systems.
Root-Cause Matrix For UV Curing Yellowing
| Cause | How It Shows Up | Common Application | Better Action |
|---|---|---|---|
| PI fragments | Yellow tone after cure | Clear coat, varnish, adhesive | Test low-yellowing PI candidates |
| Unreacted PI | Odor, migration concern, color drift | Ink, coating, adhesive | Improve conversion and dosage |
| High PI dosage | Strong cure but warmer color | LED UV, thick film | Run dosage ladder |
| Amine synergist | Yellowing plus odor | UV ink, OPV | Reduce amine or change amine type |
| Poor wavelength match | Slow cure, high PI loading | LED UV systems | Use TPO-L or 819 blend |
| Resin backbone | Yellowing after aging | Coating, adhesive, resin | Test blank resin |
| Pigment interaction | Shade shift | White ink, pigmented coating | Balance PI, pigment, and amine |
| Thermal load | Yellowing after heat | Adhesive, wood coating | Lower cure heat and aging stress |
UVIXE field note: In one clear plastic coating case, the buyer first wanted to replace 184 because the cured film looked slightly warm. After we checked the curing window, the real issue was overexposure under a high-energy mercury lamp. The formula did not need a full PI change. It needed lower UV dose and a dosage ladder test.
Which Photoinitiators Have Lower Yellowing Risk?
There is no single non-yellowing photoinitiator for every formula. The right answer depends on lamp wavelength, resin type, pigment load, film thickness, oxygen exposure, and final color tolerance.
Photoinitiator Yellowing Risk Matrix
| Photoinitiator | Yellowing Risk | Cure Strength | Better Use Case | My Buyer Advice |
|---|---|---|---|---|
| 1173 | Low | Fast surface cure | Clear coatings, varnishes, adhesives | Good first test for transparent systems |
| 184 | Low | Balanced cure | Wood coating, plastic coating, OPV | Strong candidate for low-yellowing clear films |
| TPO | Low to medium | Fast cure, LED response | Clear and pigmented UV systems | Check application and market compliance |
| TPO-L | Low | Liquid handling, LED curing | LED UV coatings, inks, adhesives | Useful when liquid blending matters |
| 819 / BAPO | Low to medium | Deep cure | White coatings, pigmented inks, 3D resin | Control dosage and shade |
| ITX | Medium to high | Type II ink cure | Pigmented UV inks | Needs amine and color control |
| DETX | Medium | Type II response | UV inks and colored systems | Test odor and aged color |
| 907 | Medium to high | Surface cure in dark inks | Pigmented ink systems | Not my first choice for clear systems |
| 369 | Medium | Pigmented system performance | Screen inks, colored inks | Use when cure depth matters more than clarity |
For low-yellowing clear systems, compare Photoinitiator 1173 vs 184 first. For LED systems, compare TPO vs TPO-L. For thick, white, or pigmented systems, review TPO vs 819 before setting a test plan.
Type I vs Type II Photoinitiator Yellowing
Type I photoinitiators split directly after absorbing light. Type II photoinitiators usually work with a co-initiator such as an amine. This difference matters because amines can help surface cure, but they can also increase yellowing and odor.
| Item | Type I Photoinitiators | Type II Photoinitiators |
|---|---|---|
| Typical examples | 1173, 184, TPO, TPO-L, 819 | ITX, DETX with amine systems |
| Main advantage | Direct radical generation | Useful in pigmented inks |
| Yellowing risk | Often lower in clear systems | Often higher if amine is high |
| Best fit | Clear coating, adhesive, varnish, 3D resin | UV ink, colored systems |
| Main control point | PI dosage and wavelength | Amine type, amine dosage, odor, color |
If your product is clear, white, or optical, I prefer to start with Type I logic first. If your product is a pigmented UV ink, Type II systems may still be needed, but they must be tested with amine control.
How Do Amine Synergists Affect UV Ink Yellowing?
Amine synergists help reduce oxygen inhibition. This improves surface cure. But they can also create yellowing, odor, and moisture sensitivity.
This is a classic UV ink problem.
A factory sees a sticky surface. The lab adds more amine. Surface cure improves. Then the white ink turns cream, the OPV smells stronger, or the aged sample fails color approval.
Technical discussions on oxygen inhibition in UV curing explain why oxygen can block surface cure and why amines are often used to support curing. RadTech/IGM research on amine synergists and yellowness also shows why cure speed and color must be balanced.
Amine Troubleshooting Logic
| Production Symptom | Wrong Reaction | Better Reaction |
|---|---|---|
| Sticky ink surface | Add amine blindly | Check lamp dose, oxygen, PI blend, and amine type |
| White ink yellows | Blame TiO₂ only | Test amine-free and lower-amine versions |
| OPV yellows after aging | Change varnish only | Compare PI package and amine level |
| Odor complaint | Add fragrance | Reduce residual amine and improve conversion |
| Poor LED cure | Increase total PI | Match PI absorption to LED wavelength |
My first check is simple: test the same ink with reduced amine and compare YI, odor, and surface cure. If color improves but the surface becomes tacky, the formula needs a better cure balance, not just less amine.
How Does UV Lamp Type Affect Photoinitiator Yellowing?
Lamp type changes yellowing risk because every photoinitiator absorbs light differently. Mercury lamps, gallium lamps, iron-doped lamps, and UV LED lamps do not cure the same way.
UV LED systems are more wavelength-specific. Common industrial LED wavelengths include 365 nm, 385 nm, 395 nm, and 405 nm. If the old photoinitiator package does not absorb well at the new wavelength, the lab may raise dosage. That can increase yellowing.
Lamp Matching Table
| UV System | Common Yellowing Risk | PI Direction |
|---|---|---|
| Mercury lamp | Heat load and over-cure | 1173, 184, TPO, blends |
| LED 365 nm | Clear film cure balance | 184, TPO-L, selected blends |
| LED 385 nm | Need stronger absorption | TPO-L / 819 blend |
| LED 395 nm | Deep cure challenge | 819 / TPO-L blend |
| Thick pigmented film | Poor light penetration | 819 with dosage control |
| Heat-sensitive substrate | Thermal yellowing | LED + low-yellowing PI package |
If you need a basic mechanism review before changing your UV package, read what a photoinitiator does.
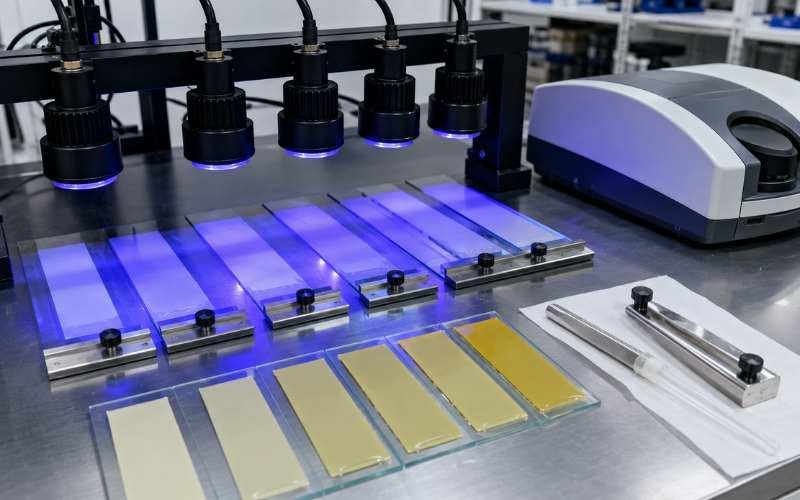
How To Test Photoinitiator Yellowing In A Practical Lab
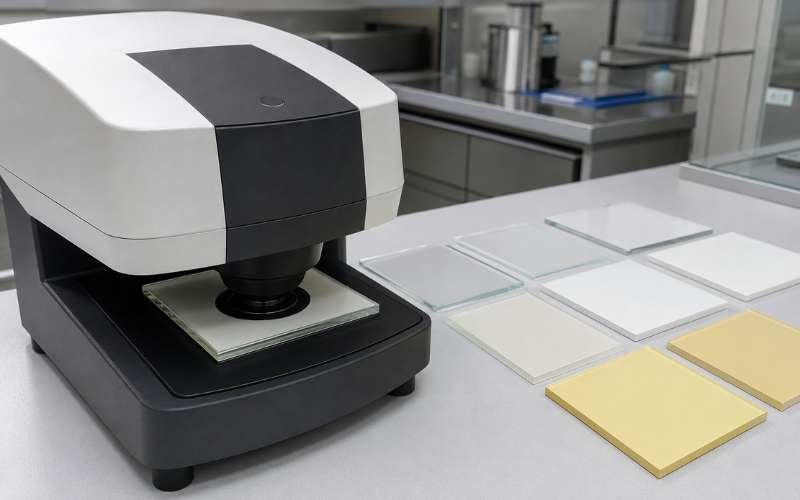
Visual checking is not enough. Your buyer, your QC team, and your customer may judge color under different light. Use measurable color data.
HunterLab’s Yellowness Index guidance explains how ASTM E313 uses tristimulus values to calculate yellowness. For UV factories, this matters because clear, white, and light-color products need repeatable color approval.
Suggested Screening Test Parameters
These are screening examples, not universal pass/fail standards. Each factory should set its own customer-approved limits.
| Test | Suggested Setup | What It Tells You |
|---|---|---|
| Initial YI | Measure 10–30 minutes after cure | Yellowing from cure package |
| Heat aging | 60–80°C for 24–72 hours | Thermal yellowing risk |
| UV aging | Controlled UVA or customer-required exposure | Light stability |
| Film thickness ladder | 10 μm / 25 μm / 50 μm | Whether deep cure affects color |
| Dosage ladder | 1%, 2%, 3%, 4% total PI | Lowest effective PI level |
| Blank resin control | Resin without PI | Whether resin causes yellowing |
| Amine control | With and without amine | Amine contribution |
| LED wavelength test | Same formula under different LED wavelengths | Wavelength mismatch |
If you have YI or Δb* data, send the initial and aged values to UVIXE. We can help judge whether the issue looks like PI dosage, amine, resin aging, or wavelength mismatch.
How To Interpret Yellowing Test Results
Testing without interpretation wastes time. The test result should tell you what to change next.
| Test Result | What It Means | Next Move |
|---|---|---|
| Blank resin yellows after heat aging | Resin or oligomer issue | Do not blame PI first |
| Current PI sample yellows immediately | PI fragments, over-dose, or over-cure | Test 1173 / 184 / TPO-L |
| Lower PI dosage reduces yellowing but tack increases | Cure balance problem | Adjust PI blend, not only dosage |
| Amine-free sample is cleaner but sticky | Oxygen inhibition issue | Change amine type or surface cure strategy |
| LED sample yellows more than mercury sample | Wavelength mismatch or higher dosage | Test TPO-L / 819 blend |
| 819 sample cures deeply but shifts white shade | Deep cure works, color needs control | Lower 819 or blend with another PI |
| Aged sample yellows but initial sample is clean | Post-aging problem | Test resin, amine, stabilizer, and heat load |
This is where many factories lose money. They see one failed sample and change three raw materials at once. Then they cannot tell which change solved the problem.
How To Fix Yellowing By Application
Different UV products need different photoinitiator logic. A clear adhesive, white ink, and SLA resin may all ask for “low yellowing,” but they do not need the same PI package.
How To Reduce UV Clear Coat Yellowing
For UV clear coat yellowing, start with a low-yellowing Type I direction. I usually test 1173 and 184 first.
- Use 1173 when liquid handling and fast cure matter.
- Use 184 when balanced cure and low yellowing matter.
- Avoid excessive PI dosage.
- Check over-curing under mercury lamps.
- Run heat and UV aging before approval.
How To Choose A Low-Yellowing Photoinitiator For White Ink
White ink is harder because TiO₂ blocks light. The formula may need deep cure support from 819/BAPO, but shade control remains critical.
- Test 819 with strict dosage control.
- Check amine contribution before blaming pigment.
- Measure YI and Δb* after cure and aging.
- Compare cure depth, odor, and final shade together.
- Avoid judging by cure speed alone.
How To Fix Yellowing In UV Adhesives
UV adhesives often fail by ambering after heat aging or thick-section cure.
- Test blank resin first.
- Reduce heat load where possible.
- Compare 1173, 184, and TPO-L.
- Use 819 only when deep cure is needed.
- Test optical clarity after aging.
How To Reduce Yellowing In SLA / DLP 3D Printing Resin
SLA and DLP resins need cure depth, print speed, and color stability together.
- Match PI absorption to printer wavelength.
- Test TPO-L and 819 blends.
- Check long-term color drift after post-cure.
- Use dosage ladder testing.
- Compare printed part color, not only liquid resin color.
How To Control Overprint Varnish Yellowing
Overprint varnish can yellow from PI fragments, amines, resin, or over-cure.
- Test 1173 or 184 first.
- Reduce unnecessary amine.
- Check mercury lamp energy.
- Compare initial and aged YI.
- Confirm odor and migration requirements for packaging use.
BAPO / 819 Yellowing In White And Pigmented UV Systems
819, also called BAPO, is useful because it supports deep cure. This matters in white coatings, pigmented inks, thick films, and 3D printing resins.
But deep cure does not remove the need for color control. In white systems, even a small shade shift can turn a clean white into cream.
| Use Case | Why 819 Helps | Main Risk | Test Needed |
|---|---|---|---|
| White UV coating | Better light penetration | Shade shift | YI and Δb* |
| Pigmented UV ink | Deep cure through pigment | Amine interaction | Cure + odor + color |
| SLA / DLP resin | Cures thicker sections | Long-term color drift | Aging test |
| Thick adhesive | Better depth cure | Amber tone if over-used | Dosage ladder |
| LED UV system | Better response in longer UV range | Over-dosage | Wavelength match |
For procurement, this means 819 should not be judged only by price. It should be judged by accepted batch rate, final shade, and cure depth.
What Is The Real Cost Of Yellowing?
The cheapest photoinitiator package can become expensive after production starts.
Use this procurement formula:
Yellowing TCO = rejected batch value + rework labor + delayed shipment cost + customer claim risk + extra QC time − raw material saving
Cheap PI Package vs Low-Yellowing Optimized Package
| Cost Factor | Cheap PI Package | Low-Yellowing Optimized Package |
|---|---|---|
| Raw material cost | Lower | Higher |
| Cure stability | May need higher dosage | More stable after validation |
| Yellowing risk | Higher | Lower |
| QC burden | More repeated checks | Easier release |
| Rejected batch risk | Higher | Lower |
| Customer claim risk | Higher | Lower |
| Export shipment risk | Higher if documents or consistency fail | Lower with stable supplier |
| Real cost per accepted batch | Often higher | Often lower |
If a low-cost PI saves 3–5% on raw material but causes shade rejection in a clear coating line, the saving disappears quickly. For export orders, one delayed shipment can cost more than the annual PI price difference.
What About Compliance And Food Packaging Ink?
Yellowing is not the only issue. For packaging inks and export markets, compliance matters too.
EuPIA states in its raw material selection guidance for food contact material inks that raw materials are selected to meet legal requirements, and that non-intentionally added substances may also need attention. EuPIA also provides a Suitability List of Photoinitiators and Photosynergists for UV printing inks and varnishes used on the non-food-contact side of food-contact materials.
For TPO, buyers should check the application and destination market. The European Commission published an SCCS opinion on Trimethylbenzoyl diphenylphosphine oxide, and EU cosmetic rules around TPO show why market-specific checks are necessary. Industrial coatings and inks are not the same as cosmetics, but export buyers should still confirm compliance before approval.
What Should International Buyers Confirm Before Bulk Order?
For buyers in Europe, India, the Middle East, and Southeast Asia, yellowing control is only one part of the sourcing decision. The supplier also needs to support stable documents, shipping, and batch repeatability.
International Procurement Checklist
| Item | What To Confirm |
|---|---|
| Sample quantity | Enough for blank, control, dosage ladder, and aging tests |
| MOQ | Match lab approval, pilot batch, and full production needs |
| Lead time | Confirm production and shipment schedule before approval |
| COA / SDS / TDS | Request before payment or shipment |
| Shelf life | Confirm storage temperature and packaging condition |
| Batch traceability | Keep batch number linked to test results |
| Export packing | Check drum, carton, pallet, and labeling needs |
| Shipping route | Confirm air, sea, courier, or forwarder requirements |
| Customs documents | Confirm invoice, packing list, SDS, and HS code discussion |
| Reorder stability | Ask whether the same grade and spec can be reserved |
A distributor once asked me why I spend time on documents before talking bulk price. My answer was direct: a photoinitiator that cannot clear approval, customs, or batch repeatability is not cheap. It is a future complaint.
Supplier Checklist For Low-Yellowing Photoinitiators
A photoinitiator supplier should help you reduce risk, not only quote a low price.
UVIXE Buyer Checklist
| Buyer Need | What To Ask |
|---|---|
| Low-yellowing clear coating | Can you support 1173 and 184 samples? |
| LED UV system | Can you suggest TPO-L or 819 blend direction? |
| White coating or ink | Can you support shade and dosage comparison? |
| UV ink surface cure | Can you discuss ITX, DETX, 907, 369, and amine control? |
| Lab validation | Can you provide sample, COA, SDS, and TDS? |
| Export procurement | What are MOQ, lead time, packing, and shipping documents? |
| Batch stability | Can you provide batch traceability? |
| Distributor sourcing | Can you supply multiple PI grades from one chain? |
At UVIXE, we support photoinitiator sourcing for 1173, 184, TPO, TPO-L, 819, ITX, DETX, 907, and 369. I prefer to receive the application data first, then suggest a sample shortlist.
FAQs About Photoinitiator Yellowing
What causes the photoinitiator yellowing issue?
The photoinitiator yellowing issue is caused by photoinitiator fragments, unreacted photoinitiator, amine synergists, resin degradation, poor lamp matching, over-dosage, pigment interaction, heat, or UV aging. In most factories, it is a full formulation issue.
Which photoinitiator has the lowest yellowing?
1173 and 184 are common low-yellowing choices for clear UV coatings, varnishes, and adhesives. TPO-L is often useful for low-yellowing LED systems. 819 can support deep cure in white or pigmented systems, but it needs dosage control.
Is 1173 better than 184 for yellowing?
1173 is liquid and often easy to use in clear low-yellowing systems. 184 is solid and often gives balanced cure with low yellowing. The better choice depends on solubility, lamp type, resin, odor target, and film thickness.
Does TPO cause yellowing?
TPO can show low to medium yellowing risk depending on dosage, lamp type, resin, pigment, and aging conditions. It can work well in UV and LED systems, but buyers should test final color and check market requirements.
Is TPO-L lower yellowing than TPO?
TPO-L is often selected for low-yellowing LED UV systems because it is liquid and useful for blending. But TPO-L can still yellow if the formulation uses too much PI, too much amine, or the wrong curing energy.
Does 819 / BAPO cause yellowing?
819 can be used in white coatings, pigmented inks, and 3D printing resins because it supports deep cure. It may still affect shade if over-used. Always test YI, Δb*, cure depth, and aged color.
Why do UV inks yellow after curing?
UV inks often yellow because of amine synergists, Type II photoinitiators, pigment interaction, high dosage, or over-curing. White inks and overprint varnishes show this problem faster than dark inks.
How do you test yellowing in UV coatings?
Use a spectrophotometer to measure Yellowness Index, b, or Δb. Test both initial color after curing and aged color after heat, UV, humidity, or storage. Keep lamp, dose, film thickness, substrate, and batch data consistent.
Can I reduce yellowing by lowering photoinitiator dosage?
Sometimes. Lower dosage can reduce yellowing if the formula uses too much photoinitiator. But lower dosage can also reduce cure speed, hardness, adhesion, or solvent resistance. Use a dosage ladder instead of guessing.
What should I send to a photoinitiator supplier?
Send application type, lamp wavelength, film thickness, resin type, pigment system, current PI package, dosage, yellowing timing, and test data. This helps the supplier suggest the right low-yellowing photoinitiator package.
Keep The Cure, Control The Color
The photoinitiator yellowing issue is not solved by chasing one “non-yellowing” product name. It is solved by diagnosis, formulation control, lamp matching, dosage testing, aging data, and supplier consistency.
For clear coatings and adhesives, I usually begin with 1173 and 184. For LED UV systems, I test TPO-L and 819 blends. For white and pigmented systems, I balance deep cure against shade control. For UV inks, I check amines early because they often hide inside the yellowing problem.
The right photoinitiator is not the one that cures fastest in a lab cup. It is the one that gives stable cure, stable color, stable documents, stable shipment, and fewer rejected batches in real production.
Send UVIXE Your Yellowing Case Before You Reformulate Everything
If your UV coating, UV ink, UV adhesive, or SLA/DLP resin has a yellowing problem, send UVIXE your application type, lamp wavelength, film thickness, current photoinitiator package, dosage, and yellowing condition.
UVIXE can help you compare Photoinitiator 1173, Photoinitiator 184, TPO, TPO-L, 819, ITX, DETX, 907, and 369 for your real curing system.
Before you replace the whole formula, test the right photoinitiator package first.